macOS has a built-in utility (QuickTime) that can do a screen capture (both as a screenshot and video). I also use Monosnap which can do the same job with some additional basic editing options.
Unfortunately, neither can capture video with system sound playing on the Mac. Audio from a microphone can be recorded out of the box, but to record system audio an additional setup is required.
- Download and install a free BlackHole Virtual Audio utility.
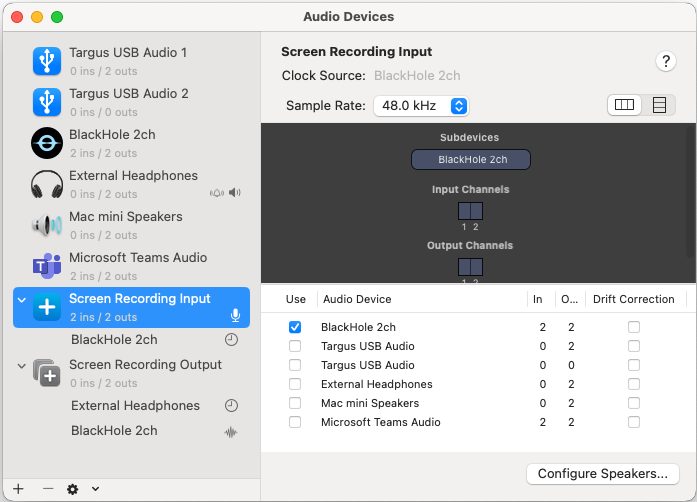
You need to give your email address to get the download link. If you don’t want to give out your real email address, you can use a disposable email service. - Open Audio MIDI Setup utility on your Mac. You should already see a BlackHole device in there.
- Click on a Plus sign (+) and create a new Aggregate Device. Rename it to “Screen Recording Input” and select BlackHole Device.
If you wish to record microphone audio at the same time, select it in here as well.
- Click on a Plus sign (+) again and create a new Multi-Output Device. Rename it to “Screen Recording Output” and select BlackHole and also your normal default Audio device (so that you can hear the sound while recording).
- Click on a Plus sign (+) and create a new Aggregate Device. Rename it to “Screen Recording Input” and select BlackHole Device.
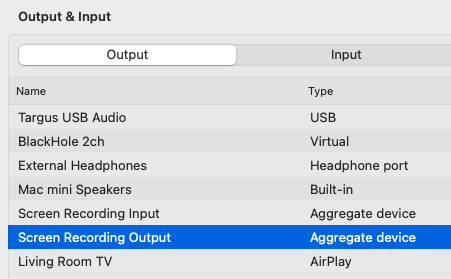
- Go to System Settings > Sound > Output and select Screen Recording Output.

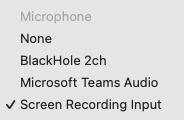
- Finally, open your screen recording application (QuickTime, Monosnap or any other) and in the microphone selection section choose “Screen recording Input“.

This is it, you can now record your video from the screen with system audio. You should also hear the sound playing from your normal audio device.
After you finish with your recording, remember to go back to System Settings > Sound > Output and select your normal audio output device (otherwise you won’t be able to change the sound volume level).
October 2023
Mac Mini M1 (2020)
macOS Ventura (13.4)
QuickTime Player 10.5
Monosnap 6.1
BlackHole 0.5

Leave a Reply