Configuring SSL-VPN service on SonicWALL NSA 220 (Firmware v5.8.1.15)
- SSL VPN > Server Settings
- Enable SSL VPN for WAN zone. (WAN icon should turn green)
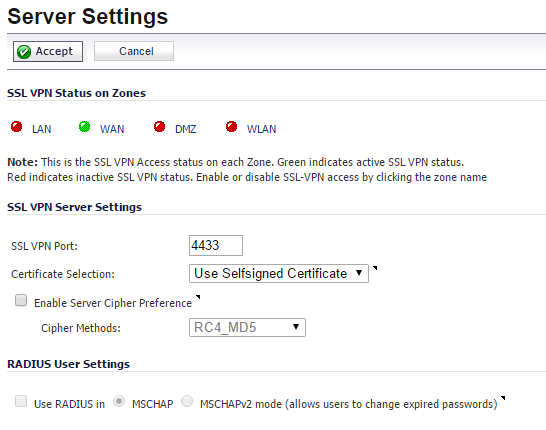
- Enable SSL VPN for WAN zone. (WAN icon should turn green)
- SSL VPN > Client Settings
- SSLVPN Client Address Range section:
- Interface: X0 (normally your LAN interface)
- NetExtender Start IP and NetExtender End IP: IP address range within above interface, but not clashing with DHCP range (and any static IP addresses) on your target network.
- DNS Server: Your DNS Server.
- User Domain: domain that clients will have to enter in their Dell SonicWALL NetExtender client software. This doesn’t have to match you target network domain.
- NetExtender Client Settings section:
- For client convenience you may want to enable Create Client Connection Profile. However, I would not recommend allowing to save passwords.
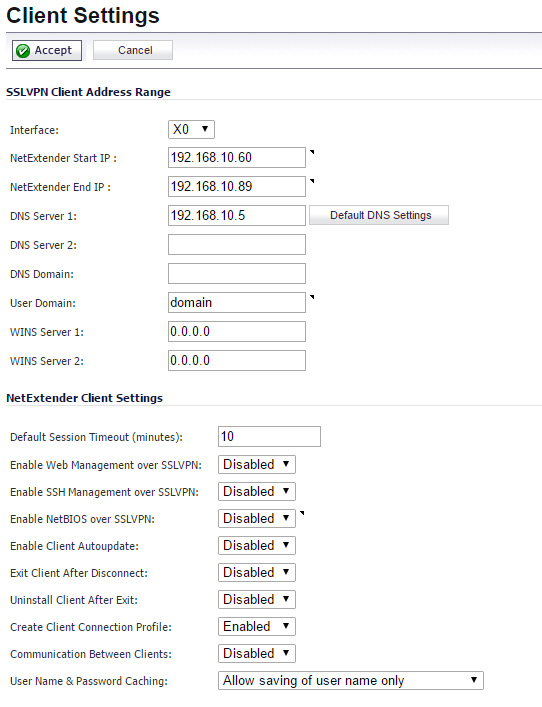
- For client convenience you may want to enable Create Client Connection Profile. However, I would not recommend allowing to save passwords.
- SSLVPN Client Address Range section:
- SSL-VPN > Client Routes
- Add at least one client route. Normally it would be X0 Subnet, but you can be more restrictive, limiting access to certain hosts or address ranges.
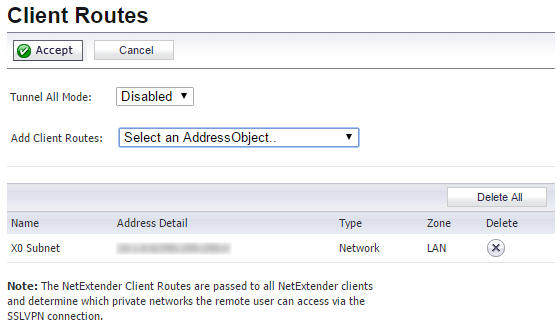
- Add at least one client route. Normally it would be X0 Subnet, but you can be more restrictive, limiting access to certain hosts or address ranges.
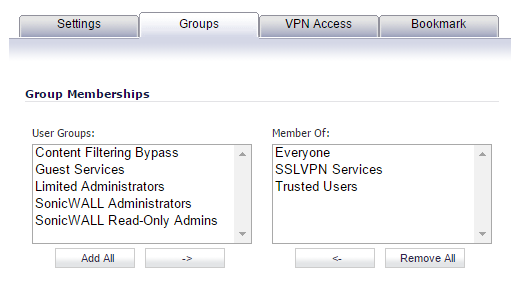
- Users > Local Users
- Add required numbers of SSL-VPN users that your clients will use to login. Each user must me a member of SSLVPN Services group and have X0 Subnet added to VPN Access “Allow” list.

- Add required numbers of SSL-VPN users that your clients will use to login. Each user must me a member of SSLVPN Services group and have X0 Subnet added to VPN Access “Allow” list.
- Network > Interfaces
- Click Configure next to your WAN interface and check HTTPS box next to User Login. Without this, users will get “Login failed – HTTPS User login not allowed from here” when trying to login to SSL-VPN web portal.
- Click Configure next to your WAN interface and check HTTPS box next to User Login. Without this, users will get “Login failed – HTTPS User login not allowed from here” when trying to login to SSL-VPN web portal.
SonicWALL NetExtender installation (on the client’s side)
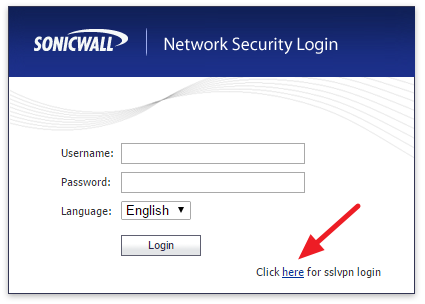
- Blowse to your SonicWALL admin interface and click on “Click here for sslvpn login“
- SonicWALL Virtual Office portal will load. Login using previously created SSL-VPN user credentials.
I had an issue where clients on Google Chrome would sometimes get automatically redirected /npNLChrome.crx webpage in which “No data received – ERR_EMPTY_RESPONSE” error would be displayed. In this case I simply instructed users to login using alternative browser.
SonicWALL may also try to install a browser plugin (which in Google Chrome case would be blocked). You can ignore this, plugin is not necessary.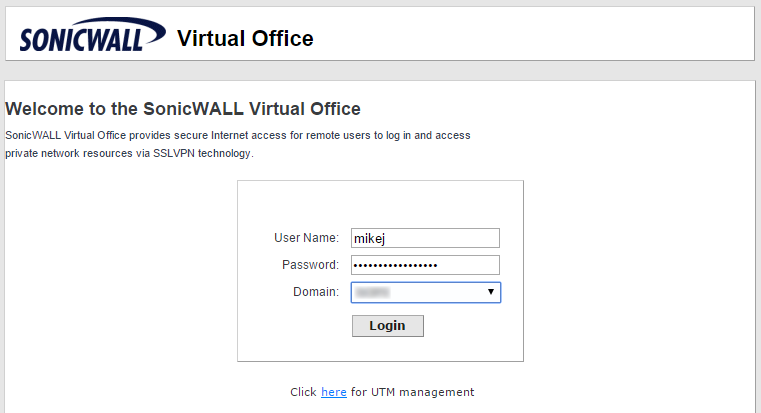
- Click on “Click here to download Windows NetExtender Client“
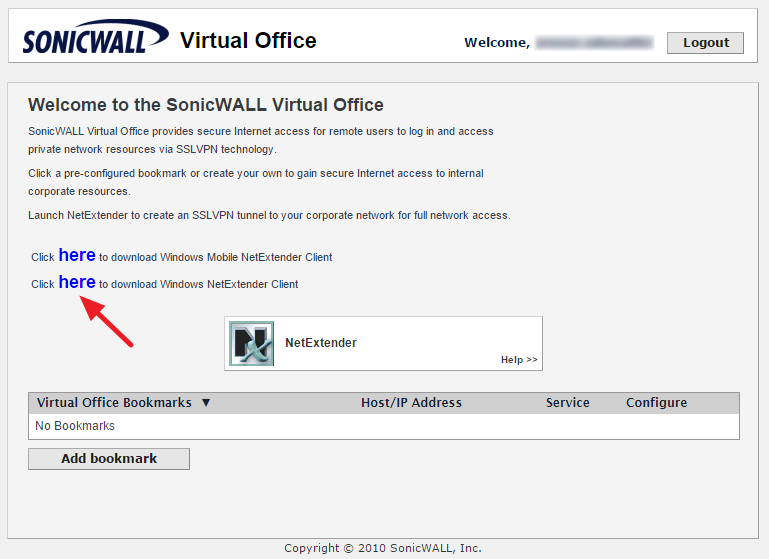
- Download and install Dell SonicWALL NetExtender (NXSetupU.exe)
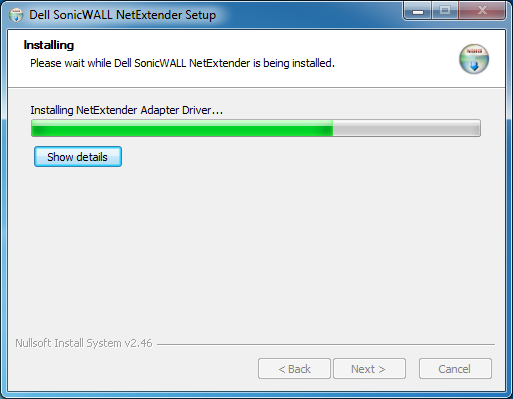
- Above steps only need to be completed once. After this, clients will be able to launch Dell SonicWALL NetExtender client directly from their Start Menu without having to login to your SonicWALL SSL-VPN web portal.
Establishing SSL-VPN tunnel (from the client’s side)
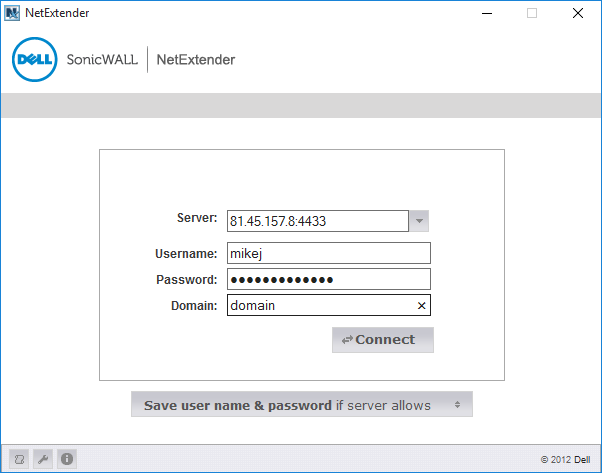
- Launch Dell SonicWALL NetExtender client
- Enter connection details (server port is normally 4433) and click Connect.
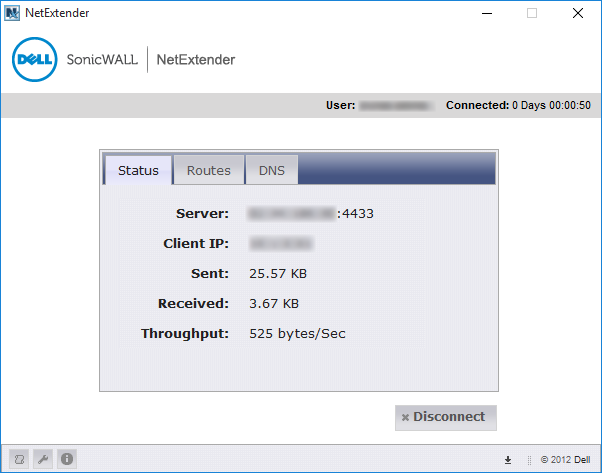
- If everything was configured correctly, NetExternder should establish VPN connection to the remote site
SonicWALL NSA 220
SonicOS Enhanced 5.8.1.15

Leave a Reply