There are number of ways to remove OneDrive from Windows 10.
Option 1 – Prevent OneDrive from starting with Windows
This method does not actually removes OneDrive from the computer, but simply prevents from automatically starting on login.
- Right click on OneDrive icon in the system tray and click on Settings
- In Settings Tab, uncheck “Start OneDrive automatically when I sign in to Windows” box.
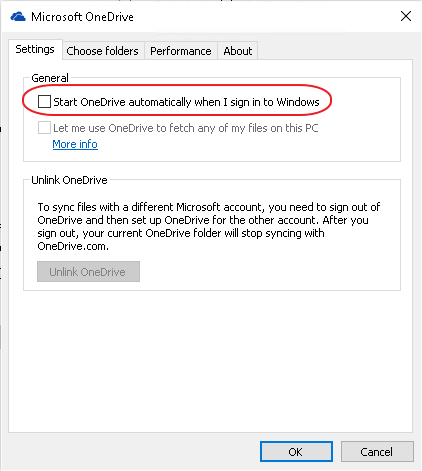
- Close OneDrive (Right click on OneDrive icon in the system tray and click Exit)
Option 2 – Uninstall OneDrive
- Close OneDrive (Right click on OneDrive icon in the system tray and click Exit)
- Open Command Prompt and run following command (assuming you are running 64bit version of Windows 10):
“C:\Windows\SysWOW64\OneDriveSetup.exe” /uninstall
For 32bit Windows, the command would be: “C:\Windows\System32\OneDriveSetup.exe” /uninstall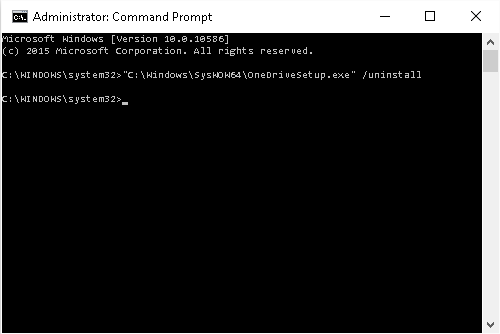
If you ever want to re-install OneDrive simply run OneDriveSetup.exe from the above location.
Option 3 – Prevent OneDrive usage via Group Policy
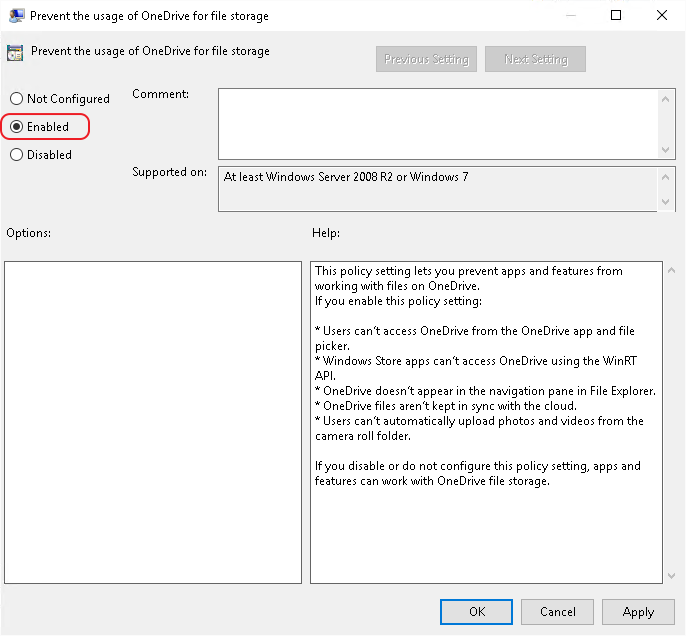
- Open Local Group Policy Editor
- Navigate to Local Computer Policy > Computer Configuration > Administrative Templates > Windows Components > OneDrive
- Open “Prevent the usage of OneDrive for file storage” policy and change its status to Enabled.
Windows 10
OneDrive
December 2015
Leave a Reply