I’m not an audiophile, but standard BMW stereo system sounds pretty bad to my ears. There are obviously very fancy (and expensive) audio system upgrades possible, but I decided to go with an official BMW Alpine kit. Mainly for two reasons: 1 – sound quality is considerably better than standard stereo (I’m not really interested in window shattering bass, etc). 2 – everything is plug and play and reversible – no modifications, splicing, wire cutting.
Car:
- BMW 320 (E90) Sedan
- Manufactured October 2011
- BMW Professional Stereo
Standard BMW Professional Stereo consists of:
- BMW Professional Head Unit
- 2 x front door speakers – 4” (10cm), 4OHM
- 2 x under-seat subwoofers – 4OHM, not sure about size
- 2 x rear deck speakers – 4” (10cm), 4OHM
Required parts:
- BMW Alpine Upgrade Kit (BMW part: 65412163268) – £360
- Door surround trim left (BMW part: 51337171201) – £25
- Door surround trim right (BMW part: 51337171202) – £25
- After the upgrade is completed, the Head Unit may require re-coding to “flatten” the built-in equalizer. BMW charges around £130 for this. In my experience BMW dealers were quite confused about this and gave me conflicting information whether the re-coding was required and why… At the end they did the “re-coding” for around £90, but I’m not convinced that it was required (or made any difference).
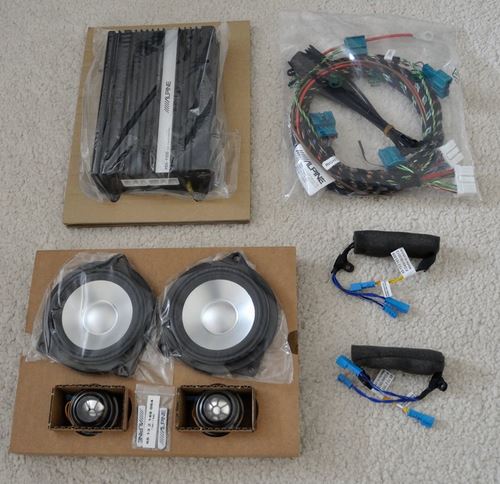
BMW Alpine Upgrade Kit ads two tweeters, replaces front door speakers with slightly better quality ones, and also ads Class D amplifier to the boot.
Here is the Alpine upgrade kit:
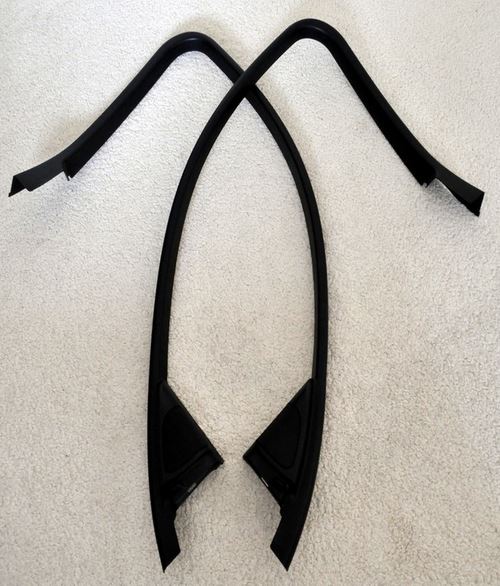
Door surround trims (this is where tweeters will go):
BMW quoted around £350 to install this kit (without re-coding), but I decided to install everything myself spend £350 on beer 🙂
Whole process took me about 8 hours, that’s including taking pictures, making notes, and doing some Googling when I got stuck few times. If I had to do this second time, it would probably take around 3-4 hours.
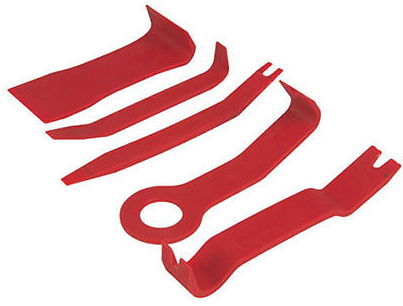
I would highly recommend getting a plastic trim removal kit. These can be bough for a few £ online, but are really useful in removing various trims around the car without causing any damage to soft plastic parts.

I managed to find some instructions in forums for Alpine upgrades on older E90 models, but nothing for 2010 – 2011 version. Hence my decision to create this step-by-step tutorial to help others (and myself if I ever need do something similar again).
I also used BMW installation document that I managed to find online (the kit comes without any kind of instructions). This document is intended for professional BMW technicians; it’s not particular clear, but definitely helped. You can download a PDF version from here.
As a precaution it’s a good idea to disconnect negative terminal of battery before starting any electrical work inside the car.
Let’s start!


Leave a Reply