Remove front door panel
Before starting fully open front windows, this will help when installing new door surrounds trims.
Images below are from the passenger side door. The only difference on the driver side is lack of a door handle (and hence one less fastener to undo).
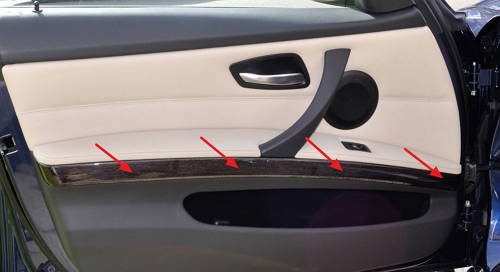
First remove a “wood effect” trim piece using plastic trim removal tool or just your fingers. Start from the door hinge side and work your way towards outside. Do not try to start from the opposite side as the trim has a small plastic hook there.
This trim is held in place by 7 metal screws that work as clips in this case. The plastic hook I mentioned previously can be seen on the left hand side.

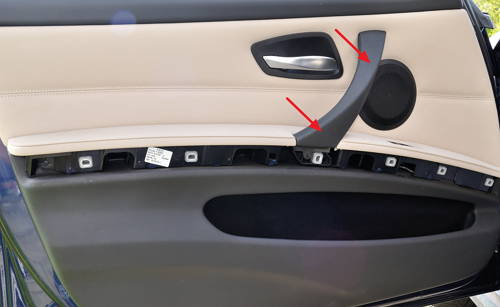
Remove door handle trim. Easiest to remove starting from the bottom.
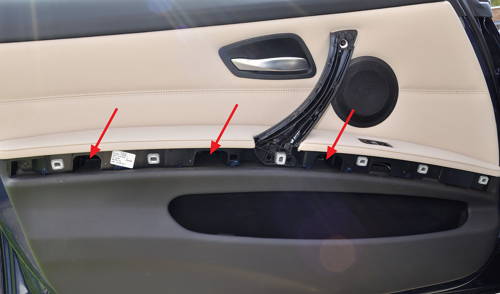
Remove 4 x T20 torx fasteners. Then remove whole door panel trim starting from the lower right corner. It’s held in place by number of plastic clips. Check if any of the clips left inside the door frame and if so remove them and put back into the trim peace. Replace any broken clips (I managed not to break any).
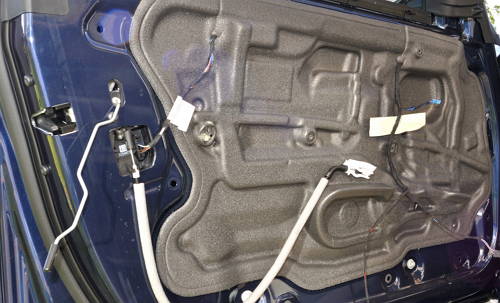
Once the door panel trim is released you will need to disconnect number of connectors from the door panel trim: speaker, entrance light, window control switch and door release handle. The most difficult to remove was window control connector. Door release handle should be disconnected from the trim side (not door frame).
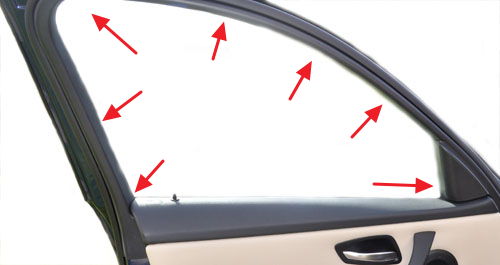
Remove door surround trim. Start from the lover corner next to the mirror and work your way around the door frame.
Repeat everything on the other driver side.

Leave a Reply