Hardware:
- Motherboard: Gigabyte Z87X-UD3H
- Audio: Realtek ALC899
- Video: Intel HD 4600 (will not be used)
- Ethernet: Intel I217V
- Graphics: Asus Nvidia GeForce GTX660 TI
- 2 x 128GB Crucial M4 SSD drives
- 1 x 2TB WD mechanical HDD
- CH-528T media dashboard (image below)

Software:
- Windows 8.1 installed on 128GB SSD
- Windows 7 installed on 2TB WD HDD that also has separate Data partition
- MAC OS X 10.9 will be installed on a second 128GB SSD
I will be using TonyMACx86 method.
- Using existing build of MAC OS X (in my case it was MAC OS 10.8 running on the same machine in VMWare workstation 9) download MAC OS 10.9 (Mavericks) from Apple Store.
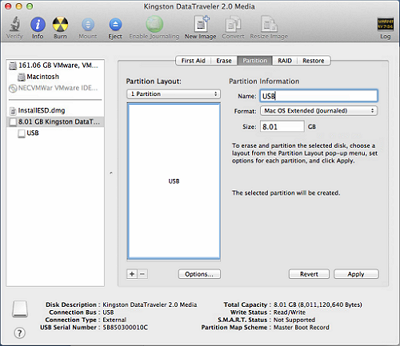
- Using “Disk Utility” prepare empty 8GB Kingston USB flash drive:
- Partition Layout: 1 Partition
- Name: USB
- Format: MAC OS Extended (Journaled)
- Options > Master Boot Record > OK
- Apply > Partition
- Download and run UniBeast 3.0.0 from TonyMACx86
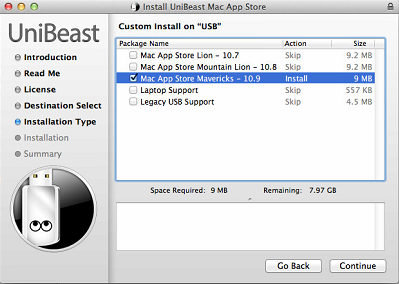
- Select USB Flash Drive as Destination
- Select to install only “Mac App Store Mavericks – 10.9”
- Click Continue and Install.
- Wait for UniBeast to complete preparing USB flash drive. Takes around 30 minutes via USB 2.
Note: When Kingston USB flash drive was connected to one of the front USB 3 ports, UniBeast would run installation indefinitely and never finish. I resolved this by using USB 2 port on the CH-528T media dashboard. - Open PC case and disconnect all hard drives, except the one where MAC OS will be installed (in this case second 128GB SSD).
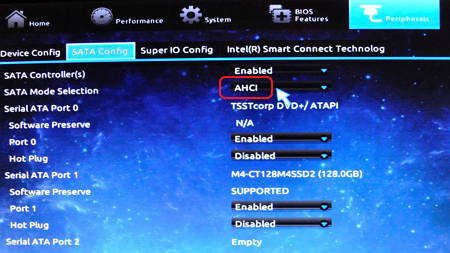
- Go into Gigabyte BIOS (press F12 for boot menu) and make sure that SATA mode is set to AHCI (Peripherals > SATA Config > SATA Mode Selection)
- Now boot from the USB flash drive. This should start MAC OS installation prepared by UniBeast.
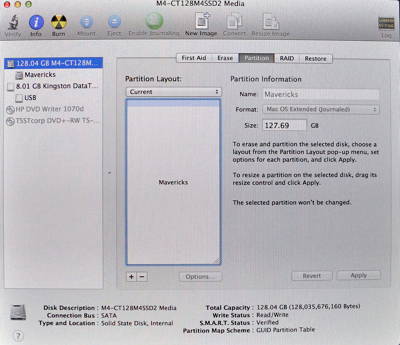
Again, use USB 2 port as when launched from USB 3 setup hangs. No advanced switches are necessary, setups loads just fine with standard config. - Choose your language and open Disk Utility from Utilities Menu. Configure the target hard drive as follows:
- Partition Layout: 1 Partition
- Name: Maverick
- Format: MAC OS Extended (Journaled)
- Options > GUID Partition Table > OK
- Apply > Partition
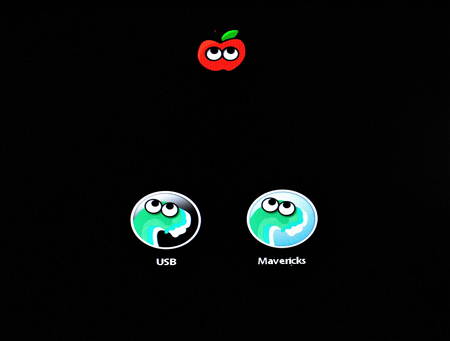
- Complete the installation. When computer reboots, boot from USB again, but this time choose Mavericks rather than USB
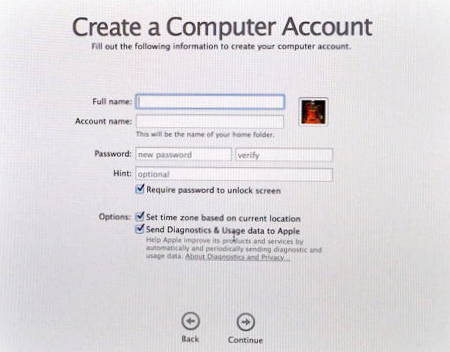
- Complete last few MAC OS setup steps
- When Desktop loads head to TonyMACx86 website and download MultiBeast 6.0.0 for Mavericks
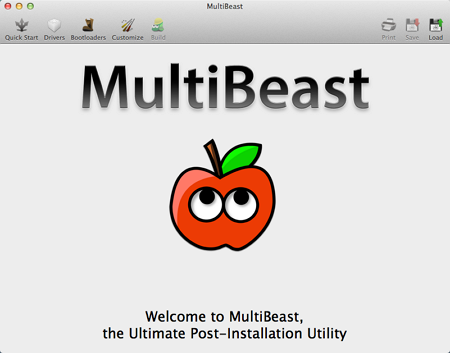
- Run the MultiBeast tool and select:
- Quick Stat Tab > DSDT Free
- Drivers Tab > Audio > Realtek ALCxxx > Without DSDT > ALC898
- Drivers Tab > Network > Intel hnak’s AppleIntelE1000e v2.5.4d
- Finish MultiBeast installation
- Remove the USB flash key and reboot the computer. Now MAC OS should boot from the disk. Make sure you have working Sound and Network.
- Shut down computer and re-connect other two hard drives.
- During Chimera boot timout press any key and it should reveal recognised partitions on all your hard drives (even non bootable)
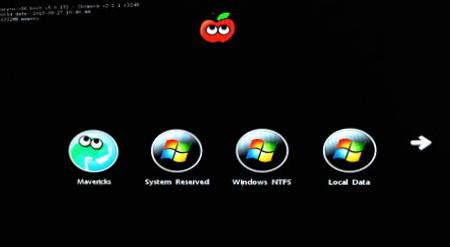
- Make note of partition names and test which partition(s) you need in order to boot Windows. In my case it was Windows NTFS for both Windows 7 and Windows 8 (via Windows 8 boot menu).
- Boot back into MAC OS and edit file Extra > org.chameleon.Boot.plist
- To hide non bootable partitions from chimera boot menu add following lines:
<key>Hide Partition</key>
<string>System Reserved; Local Data; Windows 7</string>
Where:
System Reserved; Local Data; Windows 7 – Names of partitions to hide - To make Windows default bootable OS add:
<key>Default Partition</key>
<string>hd(1,2)</string>
where:
1 – Wndows disk number
2 – Windows partition number
This is how my whole org.chameleon.Boot.plist looks:
<?xml version=”1.0″ encoding=”UTF-8″?>
<!DOCTYPE plist PUBLIC “-//Apple//DTD PLIST 1.0//EN” “http://www.apple.com/DTDs/PropertyList-1.0.dtd”>
<plist version=”1.0″>
<dict><key>EthernetBuiltIn</key>
<string>Yes</string>
<key>GraphicsEnabler</key>
<string>No</string>
<key>IGPEnabler</key>
<string>Yes</string>
<key>Kernel</key>
<string>mach_kernel</string>
<key>Kernel Flags</key>
<string></string>
<key>Legacy Logo</key>
<string>Yes</string>
<key>Timeout</key>
<string>2</string>
<key>GenerateCStates</key>
<string>Yes</string>
<key>GeneratePStates</key>
<string>Yes</string>
<key>UseKernelCache</key>
<string>Yes</string>
<key>Hide Partition</key>
<string>System Reserved; Local Data; Windows 7</string>
<key>Default Partition</key>
<string>hd(1,2)</string></dict>
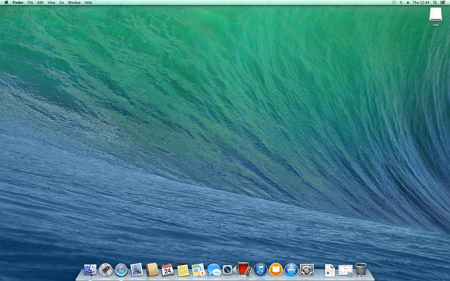
</plist> - Enjoy brand new Hackintosh 🙂
Issues to resolve
USB mouse issue (Resolved)
Occasionally after boot, Microsoft wired USB mouse wold not work. Unplugging and plugging into another USB port sometimes fixes the issue, but not always.
After more testing it appeared that it was an issue with the mouse. Although it was always working in Windows, it would occasionally not work in UEFI BIOS. Replacing the mouse fixed the issue.
WOL (Resolved)
WOL does not work when MAC is sleep mode or when PC was shut down form MAC OS (works fine in Windows).
Issue was resolved by purchasing discrete network card TP-Link TG-3468 (Realtek chipset)
Boot Errors (Resolved)
During Boot following error messages are displayed (although boot continues with no issues):
EBIOS read error: Error 0x31
Block 0x0 Sector 0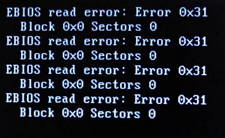
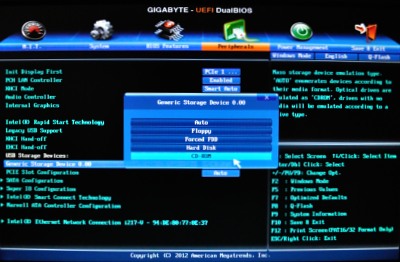
This issue was caused by CH-528T media dashboard. Specifically by its memory card reader. Resolved by making following change in BIOS:
Load system BIOS and press F2 to enter Classic Mode. In Peripherals tab USB Storage Devices section click on Generic Storage Device 0.00 and change from Auto to CD-ROM
Freeze after sleep
Occasionally, after resuming from sleep, MAC OS displays scrambled desktop image and hangs. This seems to be related to Asus Nvidia GeForce GTX 660TI video card. None of the normally recommended fixes I tried worked. For now I’ll have to do without sleep mode.
10.2013

Leave a Reply