If at any point you have had more than one Operating System on your computer, you may end up with situation where your primary Operating System and Windows bootloader are located on different physical disks. If you decide to upgrade disk where the bootloader is located, Windows will refuse to boot with error “no boot devices are present” or something similar (despite the fact that actual OS is located on another disk). In this case before replacing the hard drive you should move the bootloder to the same disk where your operating system is installed.
It is possible to move Windows 7 bootloader manually using command line utility bcdedit. Alternatively you could try replacing the hard drive and then running Windows 7 start-up repair from the installation DVD.
The easiest way to do this, however, is to use a third party utility called EasyBCD. This application is free for home and non-commercial use (otherwise it costs around $25).
You can download version 2.1.2 from here
Alternatively check EasyBCD website for the latest version

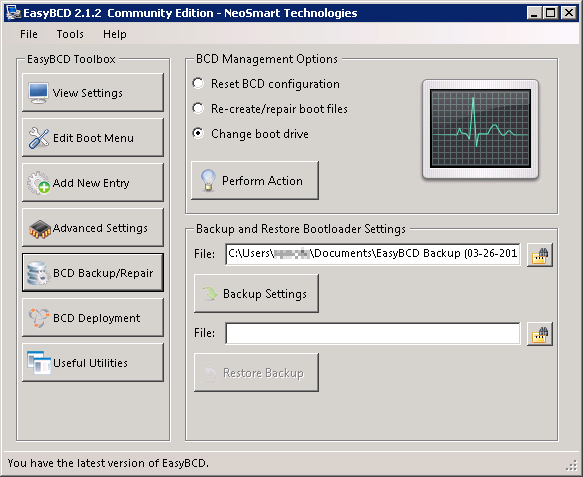
- Run EasyBCD
- Click on BCD Backup/Repair
- Select Change boot drive
- Click Perform Action
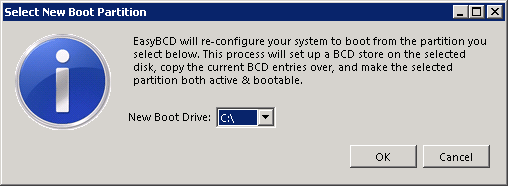
- Select partition where you want your new bootloader to be written and click OK.

EasyBCD will install the boot loader and boot manager to you selected partition and mark the partition as active. Boot files will not be removed from the old partition in case you need to revert the changes back.

Leave a Reply